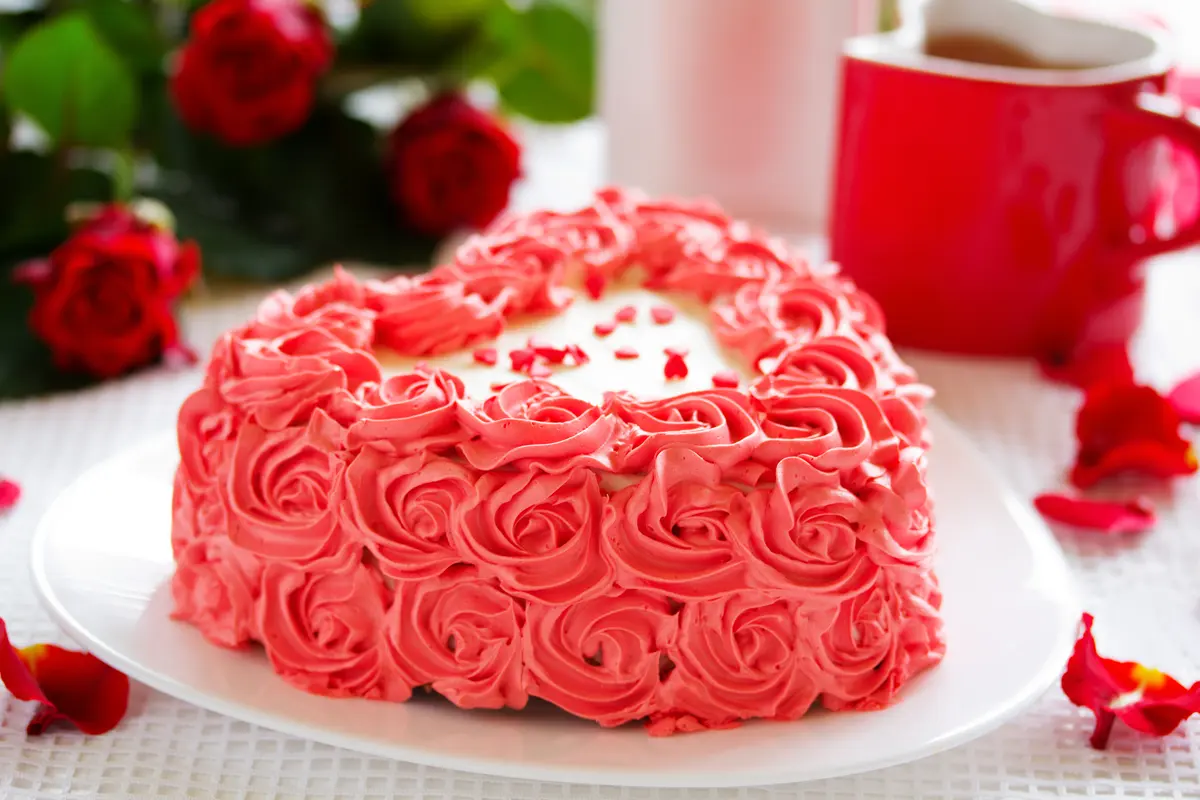
A Cake That Says Everything You Mean
Sometimes you need a dessert that does the talking for you. A cake that whispers "I love you" and "you're special" all at once. That's exactly what this Valentine Birthday Cake is designed to do—combine the sweetness of a birthday celebration with the romance of Valentine's Day in one stunning centerpiece.
I know the feeling of wanting something beautiful but not having hours to spend on elaborate decorations. This recipe gives you that restaurant-quality look with chocolate roses that feel indulgent and intentional, even though they take just minutes to assemble. The cake itself is rich, moist, and deeply chocolatey—the kind of slice that makes everyone close their eyes for a second when they take that first bite.
Whether you're celebrating a February birthday, surprising someone on Valentine's Day, or just want an excuse to make something extraordinary, this cake delivers. No fussy piping skills required. Just real ingredients, simple steps, and chocolate that does the heavy lifting.
This cake is everything you want in a celebration dessert—soft, tender crumb, velvety frosting, and a glossy chocolate rose that feels like a gift in itself. Let me walk you through how to build it from scratch, without all the stress.
Why This Cake Works So Well
I've made a lot of chocolate cakes over the years. Some were too dry. Some were too dense. Some looked better than they tasted. This one nails the balance every single time. The secret is in the hot coffee and boiling water—they bloom the cocoa powder, deepen the chocolate flavor, and create an impossibly tender crumb.
The buttercream is classic but streamlined. No candy thermometers, no egg whites, no fuss. Just butter, powdered sugar, cocoa, and cream beaten until it's light and spreadable. That's it. And the chocolate roses? They're made from simple chocolate discs or candy melts that you soften just enough to shape into petals. No molding chocolate from scratch. No special equipment. Your hands do all the work.
This cake serves 12 to 16 people, which makes it perfect for a party, a small gathering, or even a romantic date night with leftovers for breakfast the next morning. Not that I've ever eaten chocolate cake for breakfast. (Okay, maybe once or twice.)
Essential Tools for a Flawless Cake
Before we get into the ingredients, let me share the tools that make this process smoother. You don't need a professional bakery setup, but these items will save you time and frustration:
- Two 9-inch round cake pans (I prefer light-colored metal for even baking)
- A stand mixer or handheld electric mixer (you'll beat the frosting for several minutes)
- A cooling rack (wire rack allows air to circulate so cakes don't get soggy)
- An offset spatula (makes spreading frosting so much easier)
- Parchment paper rounds (prevents sticking without extra greasing)
- A toothpick or cake tester (for checking doneness)
- A serrated knife (for leveling cake tops if needed)
- A small saucepan (for melting chocolate for roses)
- Piping bag or zip-top bag (optional, for adding frosting details)
If you don't have everything on this list, don't worry. You can still make this cake with basic kitchen tools. A butter knife works for frosting. A small bowl works for melting chocolate. The important thing is that you're making something beautiful, not that you have a full culinary kit.
Ingredients Breakdown: What You Need and Why
For the Cake
- All-purpose flour (2 cups) – Gives structure without making the cake tough. I don't recommend substituting with whole wheat or gluten-free flour here unless you've tested those versions before.
- Granulated sugar (1.75 cups) – Sweetens and tenderizes the crumb. Don't reduce it or the cake will be dry.
- Cocoa powder (0.75 cup unsweetened) – Use natural cocoa powder for the best flavor. Dutch-process will work too but gives a milder chocolate taste.
- Baking soda (2 teaspoons) + Baking powder (1 teaspoon) – This double-leavening combo ensures the cake rises properly and has a light texture.
- Salt (1 teaspoon) – Enhances chocolate flavor and balances sweetness.
- Eggs (2 large) – Provide structure and richness. Make sure they're at room temperature so they incorporate smoothly.
- Strong black coffee (1 cup) – Don't worry, you won't taste coffee. It deepens the chocolate notes and makes the cake incredibly moist.
- Buttermilk (1 cup) – Adds tanginess and activates the baking soda for a tender crumb. No buttermilk? Add 1 tablespoon lemon juice to regular milk and let it sit 5 minutes.
- Vegetable oil (0.5 cup) – Keeps the cake moist for days. Butter would make it denser and drier faster.
- Vanilla extract (1 teaspoon) – Rounds out flavors.
- Boiling water (1 cup) – This is the "blooming" step that makes the cake extra tender.
For the Frosting
- Butter (1 lb or 4 sticks), softened – Don't melt it, just let it sit at room temperature for 1-2 hours. Soft butter beats into a fluffy frosting; melted butter makes a greasy mess.
- Powdered sugar (3.5 cups) – Sift it if it's lumpy. No sifter? Whisk it through a fine mesh strainer.
- Cocoa powder (0.75 cup) – Same type as the cake for consistent flavor.
- Heavy cream (0.5 cup) – Adds richness and helps achieve spreading consistency. You can substitute whole milk if needed.
- Vanilla extract (1 teaspoon) – Enhances the buttercream.
- Red food coloring (optional) – For a romantic pink or red hue. Use gel food coloring for the best result without thinning the frosting.
For the Chocolate Roses
- Chocolate candy melts (about 8 ounces, red or dark pink) or good-quality white chocolate + oil-based food coloring – Candy melts are easiest because they're already colored and set firmly at room temperature.
- Edible rose petals (optional) – For scattering around the base or on top for extra romance.
- Fresh roses (food-safe, optional) – For display only. Wash them well and remove from stems before placing on the cake. Use organic roses if you're worried about pesticides.
Step-by-Step Instructions: Building The Perfect Cake
Step 1: Prep Your Pans and Preheat
Preheat your oven to 350°F (175°C). Grease two 9-inch round cake pans with butter or nonstick spray. Cut parchment paper rounds to fit the bottoms and place them inside. Then grease the parchment too. This double-layer protection ensures your cakes release perfectly every time.
Set the pans aside while you mix the batter. Don't skip the parchment paper—it's the difference between a perfect release and a crumbled mess.
Step 2: Mix Dry Ingredients
In a large mixing bowl, whisk together the flour, sugar, cocoa powder, baking soda, baking powder, and salt. Whisk until everything is evenly distributed—about 20 seconds. This aerates the flour and breaks up any lumps in the cocoa.
Make sure your cocoa powder is fresh. Old cocoa loses its flavor. If your cocoa smells like dust rather than chocolate, buy a new container. Your cake will thank you.
Step 3: Add Wet Ingredients
Add the eggs, coffee, buttermilk, vegetable oil, and vanilla extract to the dry ingredients. Beat on medium speed with an electric mixer for 2 minutes. The batter will be thin and slightly frothy. That's exactly right.
Scrape down the sides of the bowl halfway through to make sure everything incorporates evenly. Don't overmix—2 minutes is the sweet spot. Overmixing develops gluten and makes the cake tough.
Step 4: Stir in Boiling Water
With the mixer running on low speed (or using a spatula), slowly add the cup of boiling water. The batter will become very thin—almost like a chocolate soup. This is the secret to an incredibly moist cake. The hot water "blooms" the cocoa powder, unlocking its deepest flavor.
Let the batter rest for 1 minute before pouring into pans. This allows the ingredients to settle.
Step 5: Bake and Cool
Divide the batter evenly between your two prepared pans. Bake for 30-35 minutes, or until a toothpick inserted in the center comes out clean or with just a few moist crumbs. The cakes will dome slightly—don't worry, we'll level them later.
Cool the cakes in the pans on a wire rack for 10 minutes. Then run a knife around the edges and turn them out onto the rack to cool completely. This takes at least 1 hour. Do not frost warm cakes—the frosting will melt and slide right off.
If you're in a hurry, you can speed up cooling by placing the cakes in the refrigerator for 30 minutes. But make sure they're wrapped in plastic so they don't dry out.
Step 6: Make the Frosting
While the cakes cool, make the frosting. In a large bowl (or stand mixer bowl), beat the softened butter on medium speed for 2-3 minutes until it's pale and creamy. This step is crucial—don't rush it. The butter needs to be light and fluffy to create a smooth frosting.
In a separate bowl, whisk together the powdered sugar and cocoa powder. Gradually add this mixture to the butter, about 1 cup at a time, beating on low speed after each addition to avoid a sugar cloud.
Once all the sugar-cocoa mixture is incorporated, add the heavy cream and vanilla extract. Increase speed to medium-high and beat for 3-4 minutes until the frosting is light, fluffy, and spreadable. If it's too thick, add a tablespoon more cream. Too thin, add a little more powdered sugar.
If you want pink or red frosting, add a few drops of red food coloring and beat until evenly colored. Start with 2-3 drops, then add more to reach your desired shade.
Step 7: Level and Fill the Cake
Once the cakes are completely cool, use a serrated knife to level the tops if they domed. A flat top makes stacking much easier and looks professional. Don't toss the trimmings—save them for cake pops or snacking.
Place one cake layer on your serving plate. Spread a generous amount of frosting on top—about 1 cup. Use an offset spatula to spread it evenly to the edges. Place the second layer on top, cut side down, and press gently to adhere.
Step 8: Crumb Coat and Frost
Spread a thin layer of frosting over the entire cake (the "crumb coat"). This traps any loose crumbs and gives you a clean base for the final layer. Refrigerate for 15 minutes to set.
After the crumb coat is firm, spread the remaining frosting over the top and sides. For a rustic look, leave swirls and swoops. For a smooth finish, use a bench scraper or offset spatula and spin the cake on a turntable.
Making the Chocolate Roses: The Showstopper
Method 1: Using Candy Melts
This is the easiest method for gorgeous chocolate roses. Melt red candy melts according to package directions—usually in a microwave-safe bowl in 30-second bursts, stirring after each, until smooth. If the melts are thick, add a teaspoon of coconut oil or shortening to thin them.
Let the melted chocolate cool slightly—it should be warm but not hot to the touch. If it's too hot, it won't hold its shape.
To form petals: Scoop a small amount of melted chocolate onto a piece of wax paper. Use the back of a spoon or a small offset spatula to spread it into a thin oval about 2 inches long. Make 6-8 of these ovals. Let them set for 5 minutes until they're pliable but not hard.
To assemble: Gently peel one oval off the wax paper. Roll it into a tight cylinder—this is the bud center. Wrap another oval around it, pinching the bottom slightly to secure. Continue adding petals, overlapping them slightly and curling the edges outward as you go. You want 4-5 petals for a small rose, 6-8 for a larger one.
Let the completed rose set completely (about 20 minutes at room temperature, or 10 minutes in the fridge). Then place it on your frosted cake.
Method 2: Using White Chocolate and Coloring
Melt 8 ounces of good-quality white chocolate in a double boiler or microwave. Stir in oil-based red or pink food coloring (not water-based, which will seize the chocolate). Let cool slightly, then proceed with the same petal-forming method above.
White chocolate gives a creamier texture and a slightly different flavor. It's more temperamental but the results are stunning.
Pro tip: Make extra roses in case some break. They keep well in an airtight container at room temperature for up to a week.
Decorating Your Cake
Now the fun part—turning your cake into a Valentine's birthday masterpiece. Here are a few ways to arrange the roses:
- Top cluster: Arrange 3-4 chocolate roses in the center of the top, with smaller ones around the edges. Add fresh rose petals scattered around.
- Edge cascade: Place roses around the top edge of the cake, letting a few cascade down the side. This looks dramatic and romantic.
- Nestled in frosting swirls: Pipe rosettes of frosting around the bottom edge and tuck chocolate roses into them. Adds texture and elegance.
- Minimalist: One large chocolate rose in the center, with a few edible petals scattered. Sometimes less is more.
If you're using fresh roses, make sure they're food-safe (organic, no pesticides). Remove the stems and thorns, wash gently, and pat dry. Place them on the cake just before serving so they stay fresh.
You can also add a dusting of powdered sugar around the base for a snowy effect, or drizzle melted chocolate over the top for extra indulgence.
Tips for Perfect Results Every Time
- Room temperature ingredients matter. Eggs, butter, buttermilk, and cream should all be at room temperature. Cold ingredients don't emulsify properly and can make the batter lumpy or the frosting grainy.
- Don't overbake. Check the cakes at 30 minutes. A dry cake is the biggest disappointment. Remember, carryover cooking continues after you pull them out.
- Let the cake cool completely. I know it's tempting to rush, but warm cake + frosting = sliding disaster. Give it the full hour on the wire rack.
- Chill the crumb coat. That 15-minute fridge break is non-negotiable for a smooth final layer.
- Use a turntable if you have one. It makes frosting so much easier and gives you that professional finish. A lazy Susan works in a pinch.
- Practice chocolate roses first. They take a try or two to get the hang of. Make a test rose before committing to the cake.
- Store leftover cake properly. Cover with plastic wrap or a cake dome and refrigerate for up to 5 days. Let slices come to room temperature before serving for the best texture.
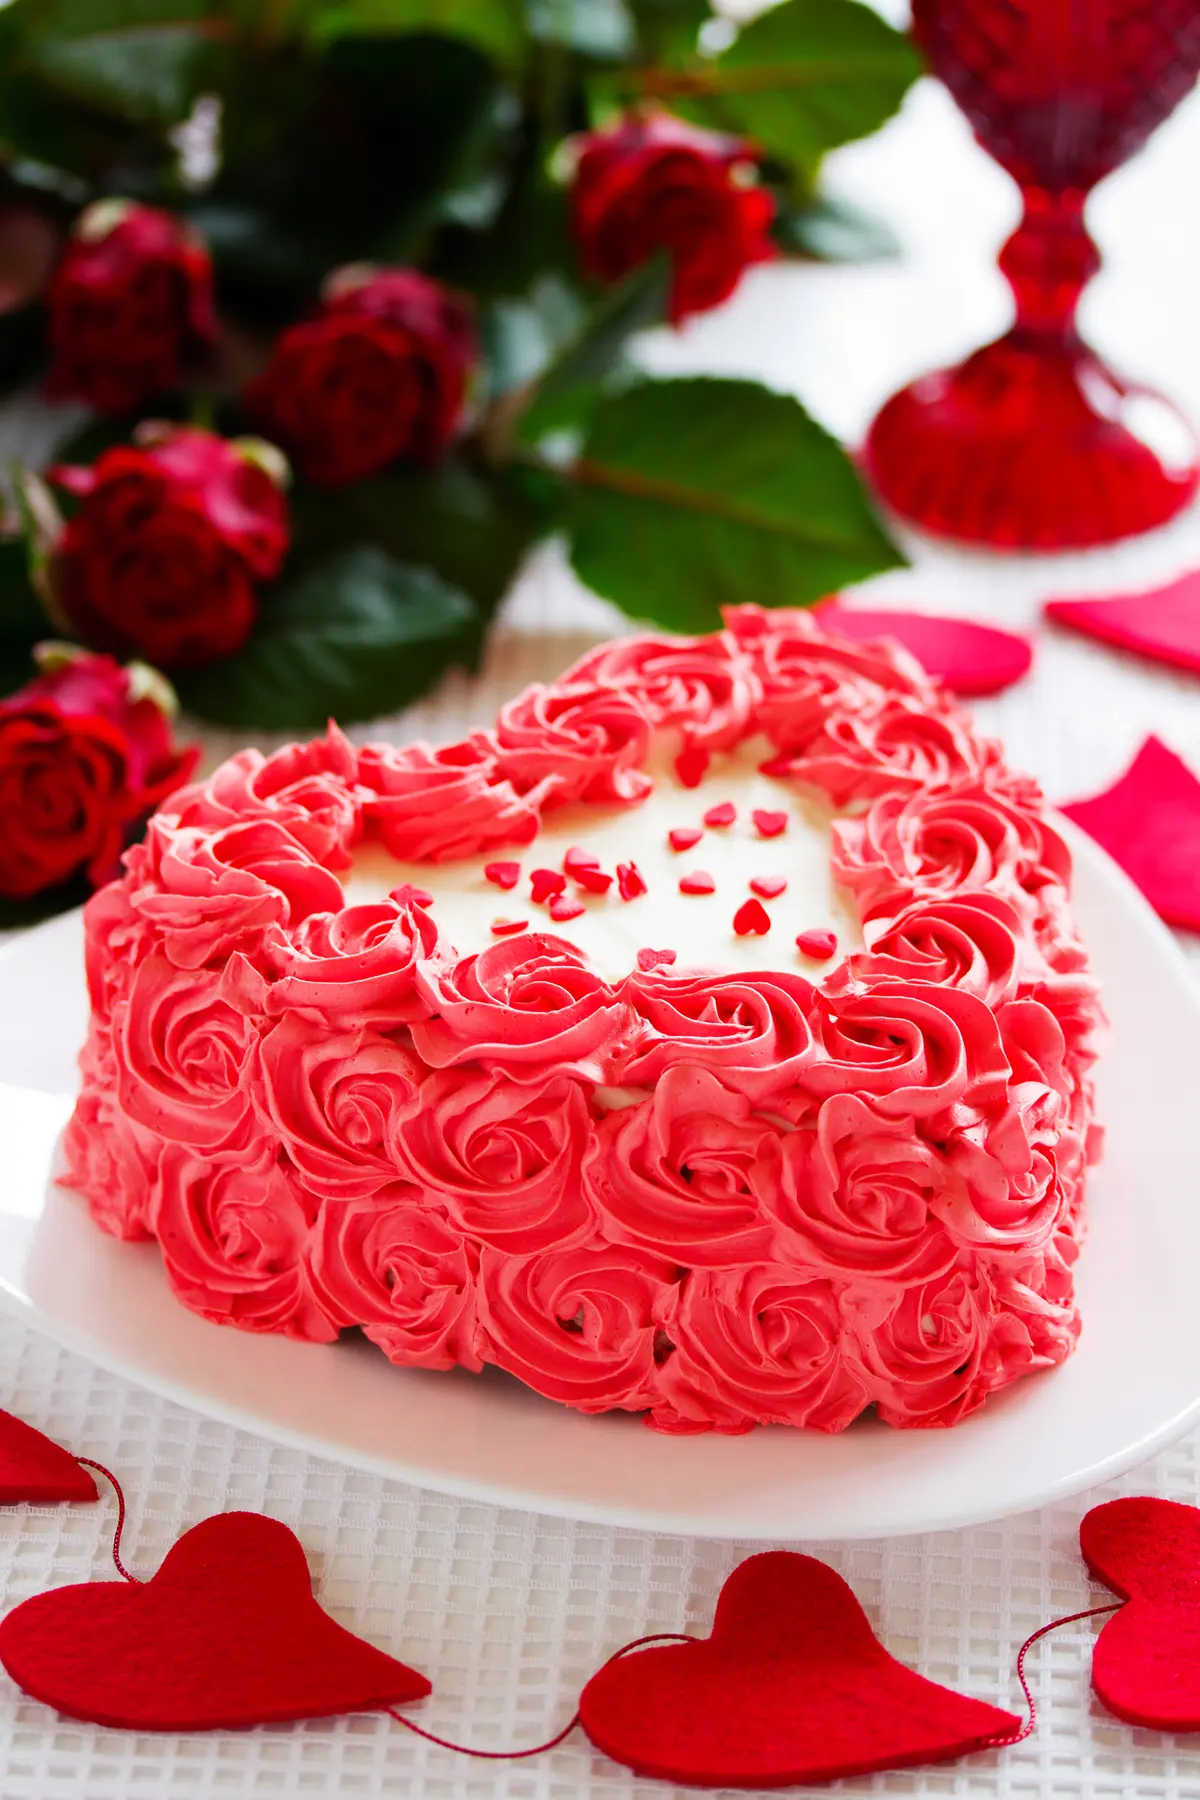
Why This Cake Is Perfect for a Valentine Birthday
There's something about combining a birthday celebration with Valentine's Day that feels extra special. You're not just celebrating another year—you're celebrating love in its fullest form. This cake honors both occasions without trying too hard.
The deep chocolate flavor satisfies any chocolate lover, while the elegant roses signal "this is a big deal." It's fancy enough for a dinner party, but approachable enough that you don't need a pastry degree to pull it off.
I've made this cake for February birthdays three years running, and it's always met with the same reaction: silence while people eat, then a chorus of "this is incredible." One friend said it was the best chocolate cake she'd ever had—and she'd eaten cake at 12 different bakeries the year before for her own birthday project.
That's the thing about homemade cake. It carries intention. Every ingredient, every rose, every swirl of frosting is a gesture that says "I took the time to make this for you." You can't buy that at a store.
Serving Suggestions for Maximum Romance
- Serve with a dollop of lightly sweetened whipped cream or a scoop of vanilla bean ice cream.
- Pair with champagne, sparkling wine, or a rich red like a Malbec or Cabernet Sauvignon.
- Garnish each slice with a fresh raspberry or strawberry for a pop of color.
- Light birthday candles and let the glow catch the chocolate roses—it's magical.
- For a Valentine's brunch, serve small slices alongside heart-shaped shortbread cookies.
Frequently Asked Questions
Can I make this cake in advance?
Absolutely. Bake the cake layers up to 2 days ahead. Wrap them tightly in plastic wrap and store at room temperature. Make the frosting up to 3 days ahead and keep it refrigerated—let it come to room temperature and re-whip before using. The chocolate roses can be made up to 1 week ahead and stored in an airtight container.
Can I use a different frosting?
Yes, this cake is versatile. Cream cheese frosting works beautifully—just use 8 ounces cream cheese and 0.5 cup butter instead of the full pound of butter. A chocolate ganache frosting (made with chocolate and cream) is also amazing. Whichever you choose, keep the proportions similar so the texture holds.
How do I make dairy-free or vegan?
For a dairy-free version, use a plant-based butter substitute (like Earth Balance), almond or oat milk in place of buttermilk (add 1 tablespoon lemon juice), and a non-dairy creamer or coconut cream for the frosting. The cake will be slightly less tender but still delicious. For vegan, substitute the eggs with a flax egg (1 tablespoon ground flaxseed + 3 tablespoons water per egg).
Can I use a different shape pan?
This recipe makes about 6-7 cups of batter total. You can use three 8-inch round pans (reduce baking time to 22-25 minutes) or one 9x13 inch rectangle pan (bake 40-45 minutes). For a heart-shaped pan, you'll need two 9-inch heart pans—bake time remains similar. Adjust the frosting amount as needed.
My chocolate roses keep breaking. What am I doing wrong?
Two common culprits: The chocolate is too cold or too hot. Let the melted chocolate cool to just warm to the touch before shaping. If it's setting too quickly, reheat gently. Also, make sure your wax paper is clean—any residue can cause sticking. If all else fails, use silicone molds for chocolate roses—they're foolproof.
Celebrate With Something Worth the Effort
This Valentine Birthday Cake decorated with chocolate roses is more than just dessert. It's a centerpiece that says "I love you enough to make something beautiful." It's the kind of cake that makes people stop what they're doing and pay attention.
Whether you're making it for a partner, a friend, or yourself (because you deserve a stunning cake on your birthday too), I hope you take the time to enjoy the process. Knead the frosting. Shape the petals. Lick the spatula. This is what baking is all about—creating moments that taste as good as they feel.
And when you cut that first slice, revealing the tender, dark crumb beneath the glossy frosting, you'll know: this cake was made with love. And that makes every bite unforgettable.
Go ahead. Light the candles. Make a wish. And pass the cake.
Valentine Birthday Cake Decorated With Chocolate Roses
Ingredients
- 2 cups all-purpose flour
- 75 cups granulated sugar
- 75 cup unsweetened cocoa powder
- 2 teaspoons baking soda
- 1 teaspoon baking powder
- 1 teaspoon salt
- 2 large eggs
- 1 cup strong black coffee
- 1 cup buttermilk
- 5 cup vegetable oil
- 1 teaspoon vanilla extract
- 1 cup boiling water
- 1 lb butter, softened
- 5 cups powdered sugar
- 75 cup cocoa powder
- 5 cup heavy cream
- 1 teaspoon vanilla extract
- Red food coloring (optional)
- Edible rose petals or fondant roses for decoration
- Fresh roses for display (food-safe)
Instructions
- 1Preheat oven to 350°F (175°C). Grease and flour two 9-inch round cake pans.
- 2In a large bowl, whisk together flour, sugar, cocoa powder, baking soda, baking powder, and salt.
- 3Add eggs, coffee, buttermilk, oil, and vanilla extract to the dry ingredients. Beat on medium speed for 2 minutes.
- 4Stir in boiling water until batter is thin. Divide batter evenly between prepared pans.
- 5Bake for 30-35 minutes until a toothpick inserted in the center comes out clean.
- 6Cool cakes in pans for 10 minutes, then turn out onto wire racks to cool completely (at least 1 hour).
- 7For frosting, beat softened butter until creamy. Gradually add powdered sugar and cocoa powder.
- 8Add heavy cream and vanilla extract. Beat until light and fluffy. Add red food coloring if desired.
- 9Place first cake layer on serving plate. Spread frosting evenly on top.
- 10Add second cake layer and frost the top and sides with remaining frosting.
- 11Decorate with edible rose petals, fondant roses, or fresh roses around the top edge.
- 12Add birthday candles if desired. Refrigerate for 30 minutes before serving.
- 13Slice and serve. Store covered at room temperature for 2 days or refrigerated for up to 5 days.