The First Slice
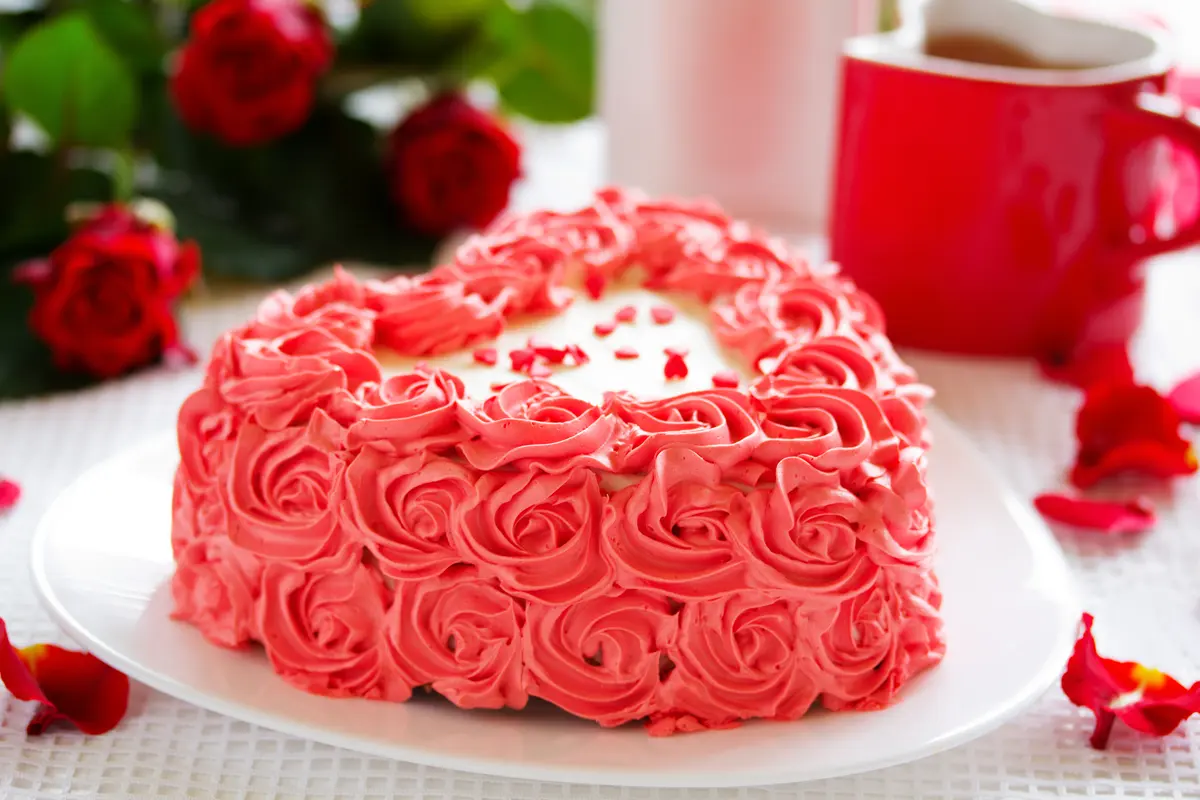
I stood at the kitchen counter, my grandmother's cake stand in both hands. My husband's birthday falls on Valentine's Day, which sounds romantic until you realize every store is sold out of candles and your dinner reservation is at 4:30 PM. I wanted to make something that said both "happy birthday" and "I love you" without being too much. This cake was the answer.
The roses felt a little risky. But that's the thing about February birthdays. You lean into the flowers or you hide from them. I chose to lean.
The One Thing That Matters
This is a chocolate cake. Not a mild, polite chocolate cake either. The hot brewed coffee is what makes it work. When you think about it, chocolate and coffee share that deep, earthy flavor. But coffee brings a bitterness that cuts through the sweetness in a way vanilla never could.
Use strong coffee. I make a cup of dark roast and let it sit for a few minutes so it cools a little before mixing. You could use espresso powder dissolved in water if that's what you have. But I've done that and honestly, the brewed coffee version is better. The flavor spreads more evenly.
What You Need
The ingredient list looks long but most of it is pantry stuff. The only thing you might not have is buttermilk. If you don't keep it around, you can make a quick version by adding a tablespoon of vinegar or lemon juice to regular milk and letting it sit five minutes.
For the frosting, use real butter. Not margarine, not a spread. I was in a hurry once and used what I thought was butter. It was a baking stick with a label that said "butter flavored." The frosting never thickened properly and slid right off the cake.
For the roses, I use organic, food-safe roses from a local flower shop. I ask specifically if they've been sprayed with anything toxic. Some grocery store roses are treated with chemicals you don't want on a cake. If you can't find safe ones, sugar fondant roses from a craft store work fine. Or skip the real flowers entirely and just arrange the frosting roses on top.
Putting It Together
Preheat to 350. Grease and flour two nine-inch round pans. I use butter and then dust them with a little cocoa powder instead of flour. That way the cake doesn't get those white flour streaks on the outside.
In a big bowl, whisk the flour, sugar, cocoa powder, baking soda, baking powder, and salt. I do this step twice. Once to combine everything and again after I realize I forgot to add the baking soda the first time.
Add the eggs, coffee, buttermilk, oil, and vanilla. Beat with a hand mixer for two minutes on medium speed. The batter will be thick and smell incredible. Then slowly pour in the boiling water and stir until it's thin and smooth. Don't panic when the water hits the batter. It turns into something that looks more like brownie batter than cake batter. That's exactly right.
Pour the batter evenly into the two prepared pans. Bake for 30 to 35 minutes. Test with a toothpick inserted in the center. If it comes out clean or with a few moist crumbs, they're done. If the toothpick has wet batter on it, give them another five minutes.
Let the cakes cool in the pans for ten minutes. Then turn them out onto wire racks. This part makes me nervous every time. I slide a thin knife around the edges, flip the pan over, and gently lift. If it sticks, I let it cool a little longer and try again.
The Frosting Trick
Beat the softened butter until it's creamy. That takes about three minutes with a hand mixer. Then gradually add the powdered sugar and cocoa powder. I do this in three batches. The first time you add the sugar, it will look like a dusty mess. Keep beating. It comes together.
Add the heavy cream and vanilla. Beat on high speed until the frosting is light and fluffy. This takes another two minutes. If you want the pink or red color, add a drop or two of red food coloring now. I sometimes mix a little pink and red to get that rose-petal shade.
The One Thing That Can Go Wrong
I always forget to soften the butter. Every single time. I pull it out of the fridge and realize it's hard as a brick. My hack is to cut the butter into small cubes and microwave it for five seconds at a time. Not more than five seconds. If you melt it, the frosting will be grainy and separate. I learned this the hard way when I made a frosting that looked like cottage cheese and had to start over.
If your cake layers come out lopsided, that's fine. You can trim the domes off with a serrated knife before frosting. I slice horizontally across the top to make them flat. The scraps go straight into my mouth or the compost bin. No judgment either way.
Assembling the Layers
Place one cake layer on your serving plate. Spread a generous amount of frosting on top. About a cup works. Smooth it out to the edges. Then place the second layer on top.
Frost the top and sides. I start with a thin crumb coat. That's a thin layer that catches all the loose crumbs. Refrigerate for fifteen minutes. Then apply the final layer of frosting. The crumb coat makes the final layer look smooth and professional. Even if you're like me and have zero piping skills.
The Roses
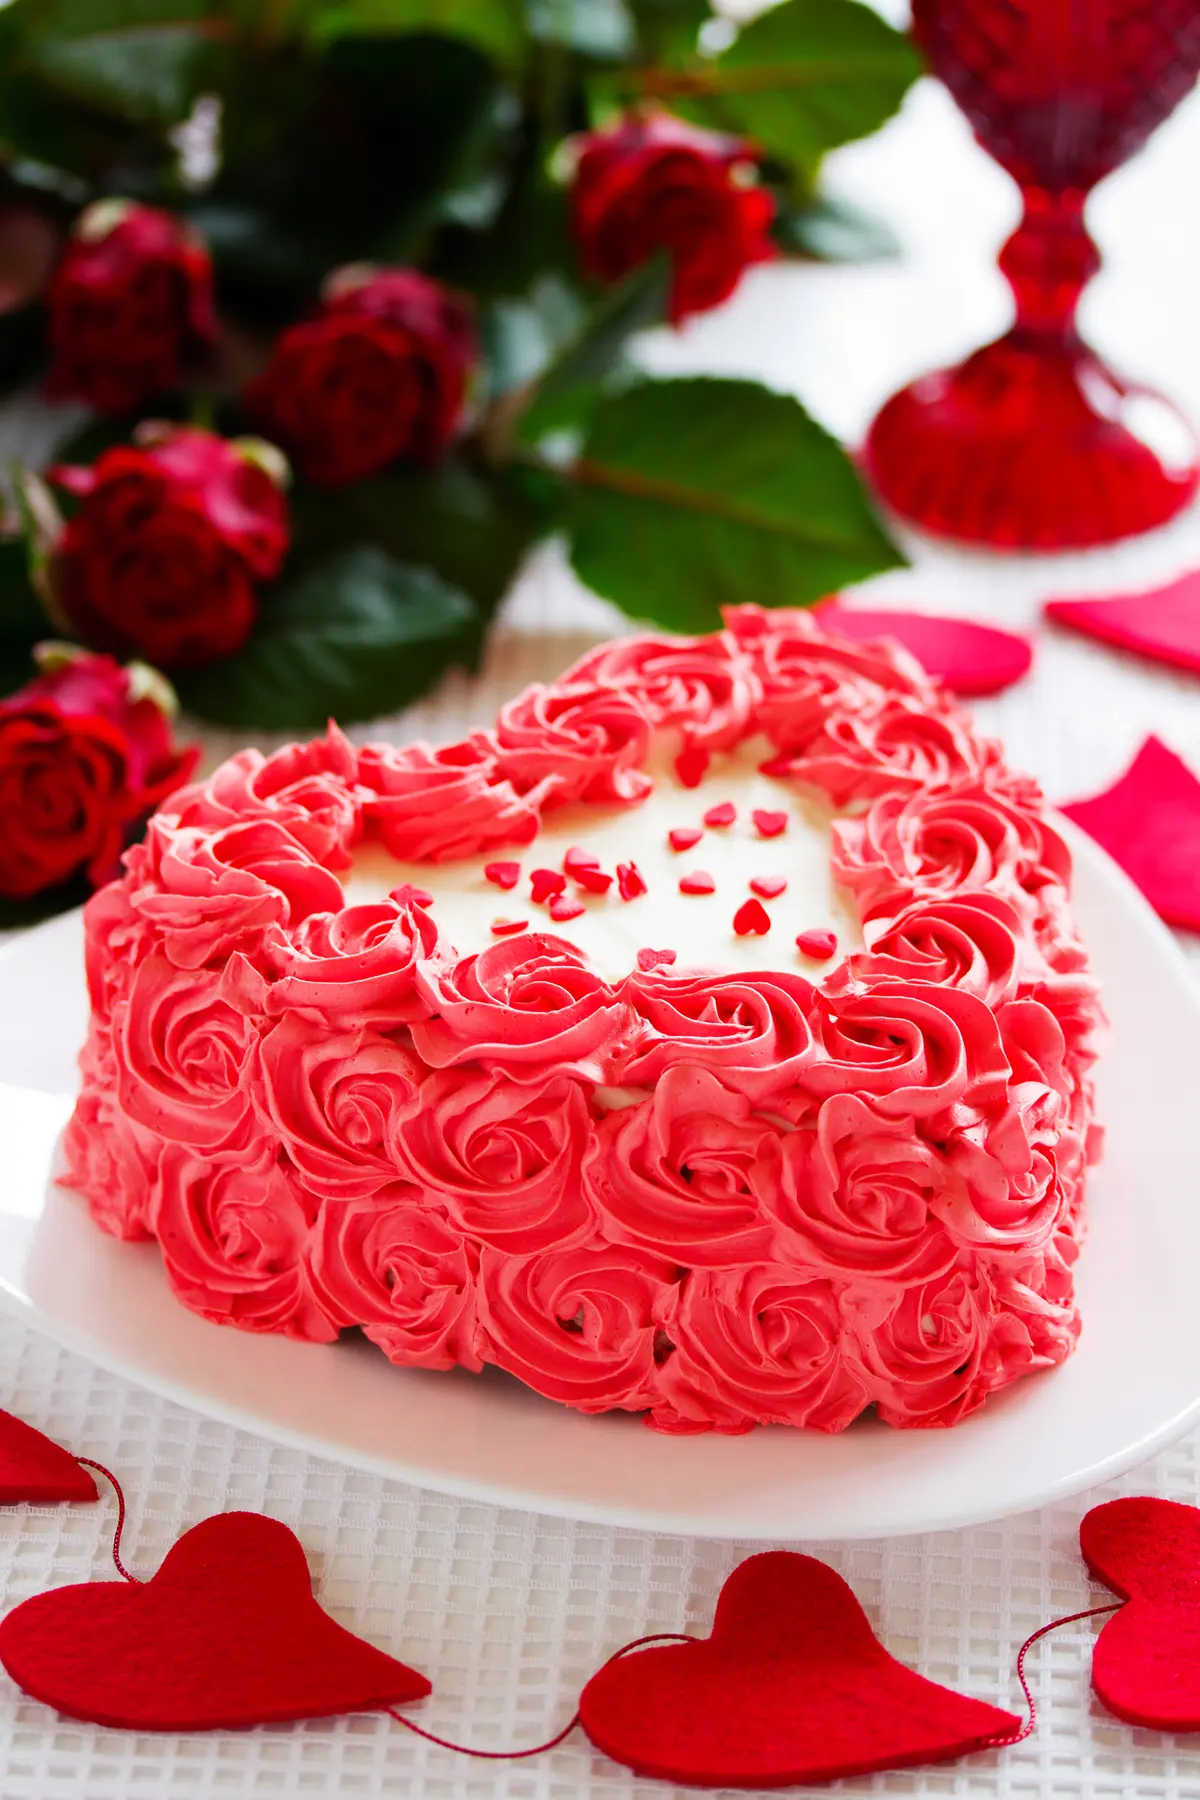
This is where you can get creative. Arrange edible rose petals in clusters on top of the cake. I start at the center and work outward in a circle. Or place fondant roses around the bottom edge. I've done both and each looks different but wonderful.
If you're using fresh roses, wash them gently and pat them dry. Then place them on top of the frosting just before serving. I stick a few on top in a small cluster and then place a few more around the base of the cake. The stems can stay on if you want them to look alive, or you can snip them short and press the petals into the frosting.
Add birthday candles if you want. I used a number candle for his age that I found online because the stores were all sold out of regular candles. It worked perfectly.
Refrigerate the cake for at least thirty minutes before slicing. This helps the frosting set and makes clean slices possible.
How to Serve It
This cake serves twelve to sixteen people. But honestly, I've seen six people finish it in one sitting with no regrets. It's that good.
Serve it at room temperature. The cake is denser and more fudgy when it's cold, but the flavors open up when it warms a little. I take it out of the fridge about twenty minutes before we cut into it.
Pair it with a glass of milk or a strong coffee. My husband had his with a dark red wine, which I thought was a little extra until I tried a sip. The cherry notes in the wine matched the chocolate somehow. Not a pairing I'd plan but it worked.
Why This Cake Works
It's not fancy. Not really. The ingredients are basic, the method is straightforward, and the decoration is optional. But the combination of the coffee, the buttermilk, and the cocoa powder creates a depth that feels special without being complicated.
My daughter helped me arrange the roses on top. She put one in the center and then a ring of them around it. She said it looked like a crown. I smiled and agreed. She doesn't know it yet, but I saved the photo of her standing next to that cake in her pajamas with frosting on her nose. That's the real reason I make this cake every year.
The birthday boy ate two slices. Said it was the best chocolate cake he'd ever had. Then he handed me a card that made me cry.
So I guess the roses worked.
Storage
Store the cake covered at room temperature for up to two days. If you live somewhere hot or humid, refrigerate it. It keeps in the fridge for up to five days. The frosting will be firmer when cold but softens again at room temperature.
Leftover slices freeze well. Wrap each slice individually in plastic wrap, then place them in a freezer bag. They keep for about a month. Thaw at room temperature for an hour before eating.
Valentines Day Birthday Cake Layered with Roses
Ingredients
- 2 cups all-purpose flour
- 1.75 cups granulated sugar
- 0.75 cup unsweetened cocoa powder
- 2 teaspoons baking soda
- 1 teaspoon baking powder
- 1 teaspoon salt
- 2 large eggs
- 1 cup strong black coffee
- 1 cup buttermilk
- 0.5 cup vegetable oil
- 1 teaspoon vanilla extract
- 1 cup boiling water
- 1 lb butter, softened
- 3.5 cups powdered sugar
- 0.75 cup cocoa powder
- 0.5 cup heavy cream
- 1 teaspoon vanilla extract
- Red food coloring (optional)
- Edible rose petals or fondant roses for decoration
- Fresh roses for display (food-safe)
Instructions
- 1Preheat oven to 350°F (175°C). Grease and flour two 9-inch round cake pans.
- 2In a large bowl, whisk together flour, sugar, cocoa powder, baking soda, baking powder, and salt.
- 3Add eggs, coffee, buttermilk, oil, and vanilla extract to the dry ingredients. Beat on medium speed for 2 minutes.
- 4Stir in boiling water until batter is thin. Divide batter evenly between prepared pans.
- 5Bake for 30-35 minutes until a toothpick inserted in the center comes out clean.
- 6Cool cakes in pans for 10 minutes, then turn out onto wire racks to cool completely (at least 1 hour).
- 7For frosting, beat softened butter until creamy. Gradually add powdered sugar and cocoa powder.
- 8Add heavy cream and vanilla extract. Beat until light and fluffy. Add red food coloring if desired.
- 9Place first cake layer on serving plate. Spread frosting evenly on top.
- 10Add second cake layer and frost the top and sides with remaining frosting.
- 11Decorate with edible rose petals, fondant roses, or fresh roses around the top edge.
- 12Add birthday candles if desired. Refrigerate for 30 minutes before serving.
- 13Slice and serve. Store covered at room temperature for 2 days or refrigerated for up to 5 days.